Punch Needle Embroidery Tutorial
1.Loosen the screw on the embroidery hoop. Separate it into two parts. Place the inner ring under the fabric, then cover it with the outer ring and tighten the screw.

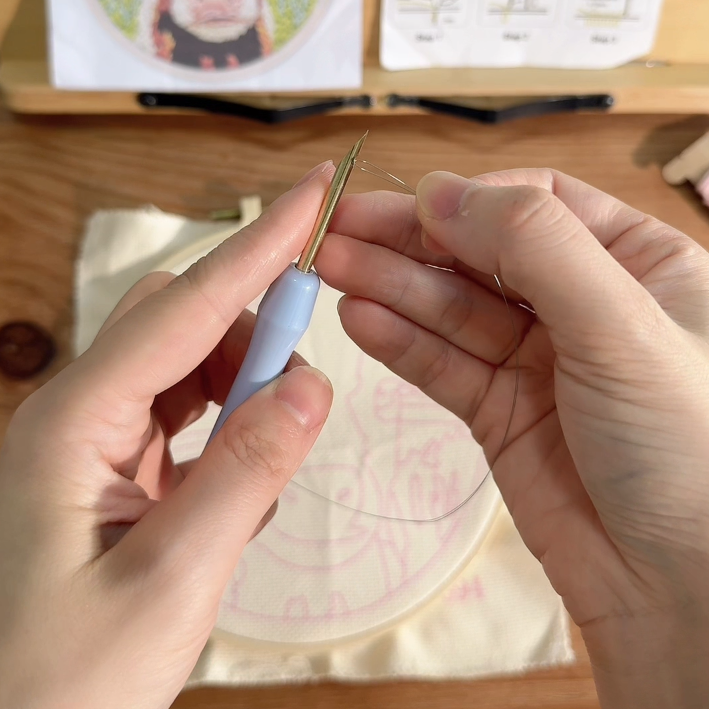
2.Insert the wire threader into the needle tube from the needle tip until the looped end comes out at the tail.

3.Pass the yarn/thread through the loop, hold the tail of the wire, and pull the thread through the needle.

4.Push the needle into the fabric at a slight angle, then flip to the back side and pull the thread through.

5.Insert the needle straight down until it stops, then gently pull it back out. The yarn will be held in place by the fabric. Continue punching one stitch at a time. Keep a gap of 3–4 squares between each stitch—don’t place them too close.

6.When you finish one color, cut the yarn at the back.

7.If you’re not satisfied with a section, simply pull out the yarn end and gently scrape the fabric surface with the back of the needle—the fabric will return to its original state.

Punch Needle Plush Effect Tutorial
